Microsoft Word Lesson 1: Beginning a Word Document and Formatting
 Microsoft Word and Google Docs are two popular word processing software programs, used for creating letters, stories and reports. MS Word is part of the Microsoft Office package, but a version with limited capabilities is available for free here. Google Docs is similar and can be found for free here. With either one, beginning a word document is the first crucial step.
Mastering Microsoft Word: Formatting and Beginning a Word Document
I will be teaching you to use MS Word 2016 throughout these lessons, using screenshots and step-by-step instructions. If you are using Google Docs or the free version of MS Word, you should be able to follow along. I would recommend doing these first lessons in order, as they continue to build. At the end, you will have a blank letter form you can use for all your business correspondences — and it all starts with beginning a word document.
Create your Document
Open MS Word (or Google Docs) and click on the first selection, a Blank Document, to begin. Word will start a new page that looks like a piece of paper with the blue menu bar or “ribbon” across the top.
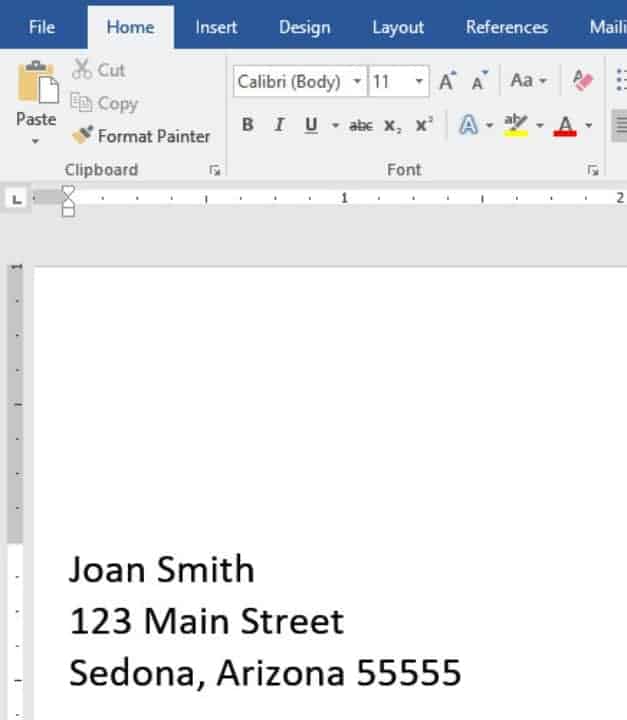
On the blank “paper” on your screen, type your full name then press enter, your street address, press enter, and your city, state and zip code. It should look something like this:
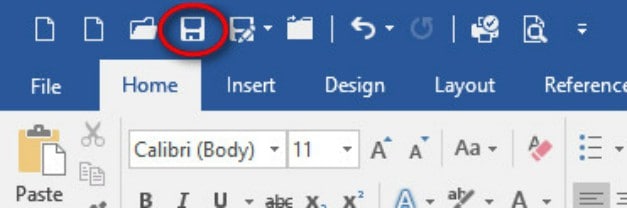
I’d like you to get in the habit of naming and saving your document at the very beginning. It’s always a good idea when beginning a word document to save frequently, that way you never have to replicate work you’ve already done. Do you see the little diskette icon at the very top of your MS Word window?
Click that to save your document. Since your name is the first line of the document, MS Word will guess that’s the name you want. We’ll be using this document with your name in our File Explorer lesson, so keep that name. It should “default” to your Documents folder. If you need help saving a document, review the Notepad lesson.
The quickest way to use word processing is to type your information first and then make it pretty, so click just past your zip code and press enter twice. Pretend it is a letter introducing yourself. Type these two sentences (or something similar) and replace the specifics with your own name and information.
“My name is Joan. Originally from Anaheim, I moved to Sedona, Arizona in 2010.”
Select Range
On your computer, there are several ways to select a “range” of words. A range is simply a group of characters starting in one spot and continuing to the end of your selection.
In your first sentence, select your name by “dragging.” Drag by clicking on the first letter, holding the mouse down as you drag to the end of your name. You know it’s selected when a darker box appears around your selection.
Let’s try another method. Click away from your name to “deselect.” Now double-click your name. Double-click selects the word. Let’s try triple-click. Triple-click selects the paragraph – everything between Enter. (Notice that a little formatting windows appears when you select your text – you can use this window or the Home tab in the next steps.)
Select All
Let’s say you have more than one paragraph, and you want to select everything you have typed, “all” of it. On the Home tab>Editing section on the far right, there is a “Select” button with a drop-down arrow next to it. Click that drop-down arrow. One of the selections is “Select All.”
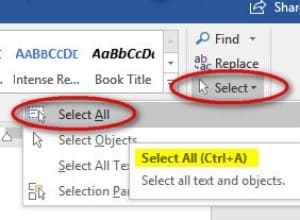
Notice if you hover your mouse over “Select All” in the menu, it will remind you of the “Select All” shortcut: “Ctrl-A.” “A” is for “All,” get it?
Hold down the “Ctrl” or “Control” button on your keyboard, usually the bottom left, then press “A.” Try both Home>Editing>Select>Select All and Ctrl-A. Both will highlight all your typing.
Changing the Font
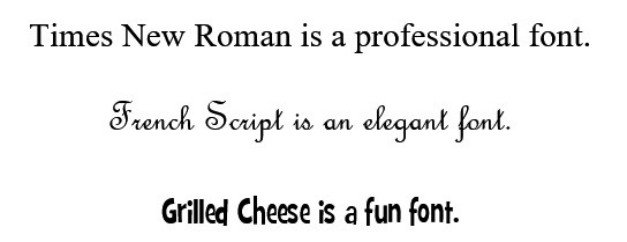
The “font” is how each character looks. Fonts can be professional, elegant, or fun.
To try out a few, first select your range by dragging through, triple-clicking, or Ctrl-A. All three are correct. On the Home tab>Font section>click the drop-down arrow next to the current style, Calibri. Calibri is also known as the the default font.
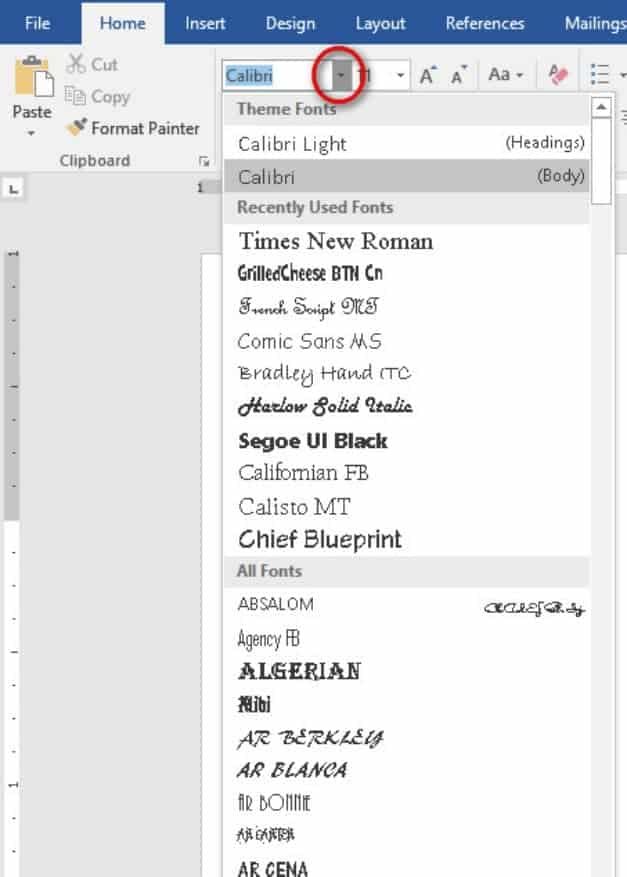
First you’ll see the current font, then any you have used recently, then an alphabetical list of all the fonts on your computer. Windows 10 comes with over 150 fonts! Luckily, they show you what they look like right on the alphabetical list. That way, when you’re beginning a word document you see which might work best.
Is it hard to read the names of some of them? Don’t use those. It is a very common mistake for new computer users to try every font available, all in one document. I repeat, don’t! A normal, professional document will have one or two different fonts, at most three, using the third for special headings like picture captions.
Today, we aren’t worrying about looking professional — just this once, ok? Change your typing into your favorite font. Now try another one — don’t worry, we’ll go back to your favorite.
Undo or Ctrl Z
Sometimes, especially in MS Word, you do one little thing and your whole document gets messed up. Or… you meant to change one word, and instead you delete everything by mistake (yes, I speak from experience). You might suddenly fear that you’ll have to start the whole doc over again: beginning a word document from scratch and having to duplicate all your work. Fortunately, this isn’t the case. Your computer has a magic “undo” command which takes you one step backward. And you can keep stepping backward as long as you want! First, look at the “Quick Access Toolbar” at the very top left of your MS Word window.
![]()
Undo is the arrow going left. The circular arrow is “Redo,” and it goes forward one step.
There is a shortcut to Undo that works almost every time on your PC. “Ctrl-Z” is the shortcut to Undo. I had you change your document into your favorite font, then we used another font, right? To “undo” the change, click “Undo” or Ctrl-Z. This should take you back to your favorite.
Formatting the Font
We changed the appearance of your whole document by changing the font; now let’s change the look of one word. “Bold” or “Boldface” makes the font darker and thicker – some fonts are already boldface and it won’t change the look. Using double-click or dragging, select your name. Look on the Home tab>Font section.
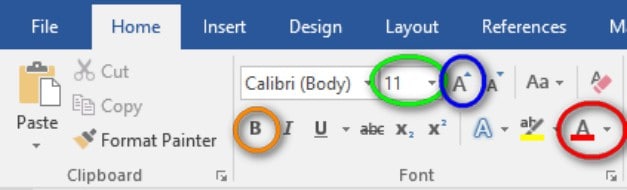
Click on “B” for Boldface, circled orange in the screenshot. The “B” is like an on and off switch. Click “B” again to remove the boldfacing. Do you see the other choices? “I” is for Italics, “U” is for Underline. Go ahead turn them on and off. Leave your name in bold.
Turn your old hometown red by following these steps. Select your old hometown, and click the drop-down arrow next to the font color icon (circled in red). Pick red. To return to the normal color, choose “Automatic,” but let’s keep it red today.
Let’s make your current hometown bigger. Select your hometown by double-clicking it. Click on the drop-down arrow next to the font size number (circled in green) and select 14. Now make it one size bigger by clicking on the Larger Font “A” (circled in blue). The Larger Font “A” and Smaller Font “A” are simple shortcuts to increase or decrease the size. Remember you can always hover over the menu choices to get a description.
Styles
With all the changes in color and size, our sentences look a little silly… fun, but silly. Microsoft always wants to help you look professional, so they have created “Styles” for us.

Did you guess that to make a change we select our range first? Now you’re getting it!
Select all your words by triple-clicking or Ctrl-A. Click on Home tab>Styles section>No Spacing. The entire document is now simple text, back in the default font. (Sometimes clicking once takes some but not all of the formatting away. Click “No Spacing” again if needed – usually twice will do it.) I like to use the “No Spacing” style for a letter because it makes our MS Word document just like a piece of paper in a typewriter.
Save and Exit
Save our document by clicking that little diskette icon in the Quick Access Toolbar — the same one you used to save it with a name at the beginning of this lesson. Now you can exit Word by clicking the “X” on the top right of the Word window. If you forget to save first, it should remind you, but let’s not trust it to chance.
And now you’ve done it! From this article, hopefully you now feel that beginning a word document is no big deal and something you can do anytime you need a doc for your business needs.