Change Font Size and Format Your Document in Microsoft Word
 Since the advent of the computer, instructors have had to become very specific with assignments. In college, if you’re writing a paper, often you’ll be given specific guidelines, such as 1.25” margins, 12 point Times New Roman font, double-spaced, paragraph format. That means you need to learn how to change margins, change font size, and overall format your document so that regardless of specification, you can rise to the occasion.
Specifications and Solutions: How to Change Font Size, Increase Margins, and More
With the magic of word processing, we can type our entire paper, then format it later, which is my favorite way to create a document. We can also set up a document at the very beginning and everything we type will follow the designated style. Today we are going to set up a document before adding any text.
Open a new MS Word blank document. The cursor will be at the very beginning. If we set the formatting on this very first line, everything that follows will use the same pattern unless we change it. So keep your cursor on that very first spot for now. You can even hit the Backspace key a few times to make sure you are at the very beginning.
Since these settings affect our printed document, we will be going back and forth between the Home and Layout tabs. Remember, the View tab only affects how your document looks on your computer monitor, not on paper.
No Spacing Style
In the Home tab>Styles section, you’ll see that the Normal style is selected when you start Word. Normal style on Word is Calibri font in 11 point size, single space between lines of text with a non-indented double space between paragraphs, aka, business style. We want to change font size, along with all the rest of those settings, so let’s begin with a clean slate. Select Home tab>Styles section>No Spacing to clear some of that formatting. Think of the No Spacing style as blank paper in a typewriter.

Font Name
MS Word 2016 starts up with Calibri as the default font. Default is another word for the standard settings. Calibri is a sans-serif font. Serif means little projections or tails going off from each letter. “Sans” means without in French, so sans-serif is without those little projections. In the box, I have compared Arial’s sans-serif style with Times New Roman’s serif style.
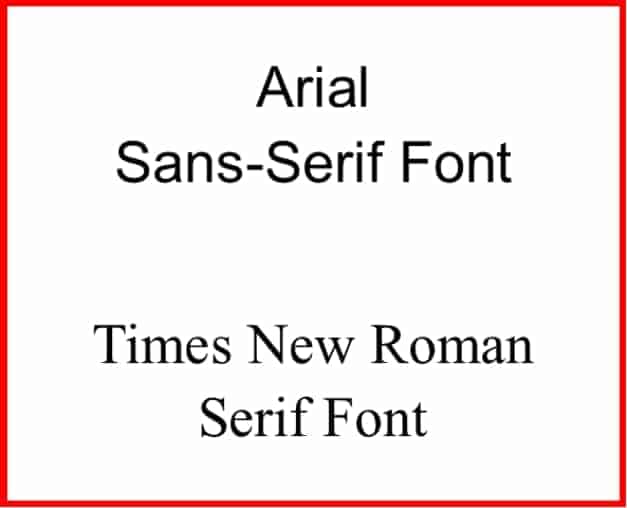
Do you see how different they are? They certainly don’t look the same size even though they are. That is one of the reasons instructors assign a specific font and size. They’ll know how long a report is; the student can’t cheat by using a font that takes up more space.
SEE ALSO: 420+ Best Font Bundles – Premium and Free Font Bundles
With your cursor at the very top of your document, change the font to Times New Roman, a common serif font. In the Home tab>Font section, select the drop-down arrow next to Calibri or your computer’s default font. Scroll down to Times New Roman.
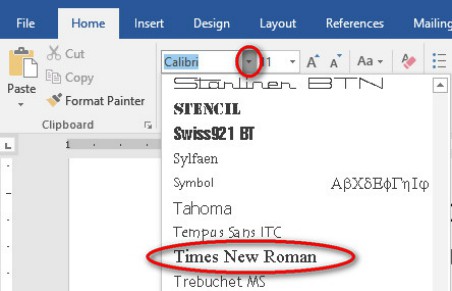
You won’t see any changes since we haven’t typed anything yet, but now the font box in the ribbon shows Times New Roman instead of Calibri, right?
Change Font Size
Now let’s change font size, so that it’s 12 points rather than 11. Back in the old days, typewriters had Pitch. Pitch was the number of characters per inch. On a really fancy typewriter, you had two choices, 10 pitch and 12 pitch. 10 pitch was 10 characters per inch, and 12 pitch was 12 characters per inch. The smaller number, 10 pitch actually looked bigger, since it seemed stretched out with fewer letters per inch.
With computers, we use point size instead of pitch. The points are how many little dots make up a printed letter. The more points the bigger the letter. So 12 points is bigger than 10 points, which makes more sense to me.
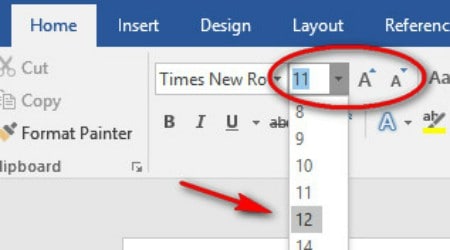
To change font size, on the Home tab>Font section, select the drop-down arrow next to the 11 point font size. Select 12. You may also select the bigger “A” to increase font size. This takes the point size up by one. Use both methods to go back and forth from 11 to 12 points, using the smaller “A” for “Decrease Font Size.”
Double-Spacing

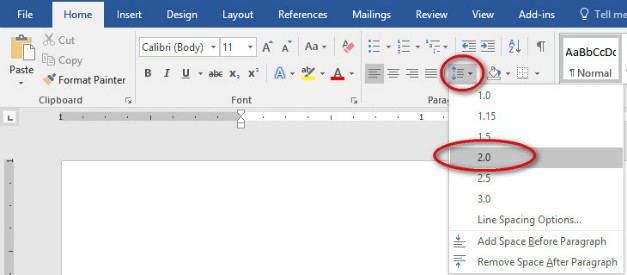
On the Home tab>Paragraph section, click the drop-down arrow next to the Line Spacing icon, which has horizontal lines with up and down arrows. Select the 2.0 for double-spacing. This will insert a blank line between each line of text. Double-spacing is very helpful for rough drafts where you want to mark-up and edit your printout, or a supervisor wants to make suggestions.
Paragraph Style
In writing, a common paragraph style has the first line indented 1/2” or about five spaces. For an example, just look at any paperback or magazine article in your house.

In the Home tab>Paragraph section, look for the more choices arrow. This is a small icon at the bottom right of a section. When you click it, MS Word usually opens a new window with, you guessed it, more choices. When you click the Home tab>Paragraph>More Choices arrow, you’ll get the Paragraph Window.
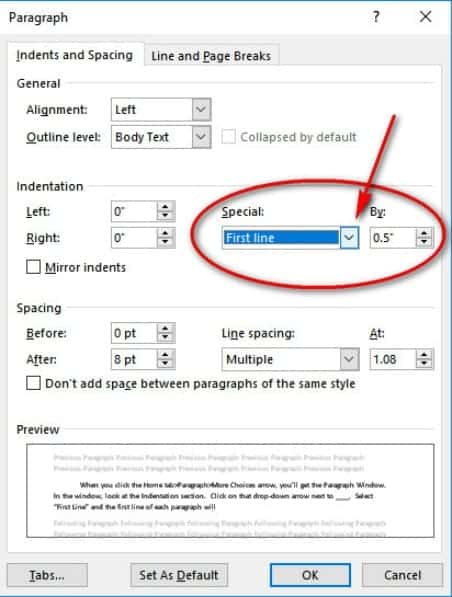
In the Paragraph Window, look at the Indentation section. Indented paragraphs are common, so Microsoft has a short-cut for that setting. Click on that drop-down arrow in the Special box. Select First Line and the first line of each paragraph will be indented. The default indentation is 1/2”, also written as 0.5”. Make sure 0.5” shows in the “By” box, and click OK.
Margins
Margin settings are on the Layout tab. First, I’d like you to see that Layout has a paragraph section, too. Clicking Layout tab>Paragraph section>More Choices also takes you to the Paragraph Window. Remember, there are usually two or more ways to give a command in MS Word. Click Cancel to get out of the Paragraph Window.
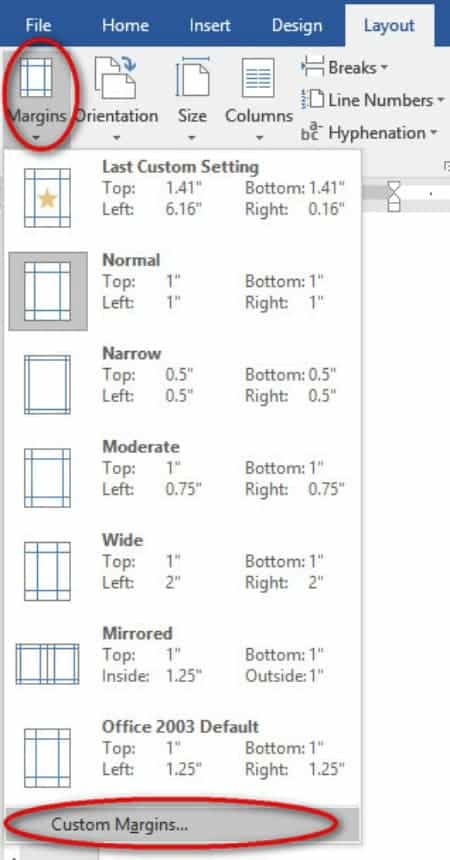
Click the Layout tab>Page Setup section>Margins icon, and the margin menu drops down. Microsoft has already set up several common margins, with the most popular 1” default at the top. The old Microsoft default is at the bottom with 1.25” on the left and right. Today we need 1.25” margins on the sides, but we want the top and bottom to be 1.25” also. Let’s select Custom, the very last option.
The Page Setup Window will appear. Change all the 1” settings to 1.25”: top, bottom, left and right margins. Then select OK.

Check Your Work
Let’s go back and make sure we followed all the instructor’s instructions.
- 1.25” margins
- 12 point Times New Roman font
- double-spaced
- indented paragraph format
We did it!
Title Formatting
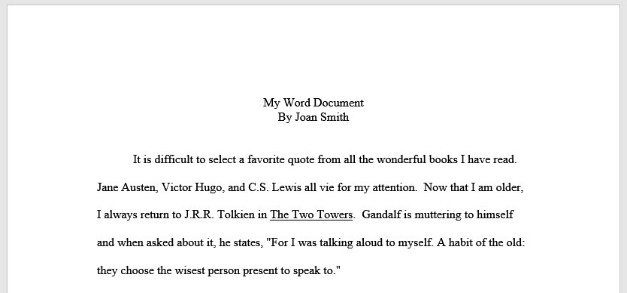
Just to see what happens, let’s start typing. Type your title, something like… “My Word Document” and press Enter. Type your byline, “By _____,” and enter. Now start typing your favorite literary quotes or any two or three sentences, so you can see if the indented paragraph is working correctly.
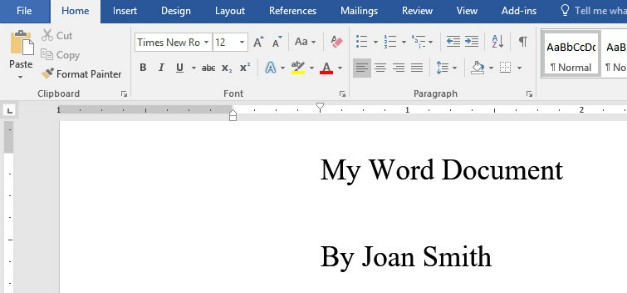
Uh, oh. The bit about my favorite quote looks right, but we probably didn’t want the title and byline double-spaced and indented.
We can fix that. Drag through both lines, but not through the lines of your narrative below them… just to the end of your name. We’ll use the same techniques we used above to make those two lines single-spaced. From Home tab>Paragraph section>Line Spacing, select 1.0.
Our title and byline should not be indented. With them still selected, remove the indented paragraph from the Home tab>Paragraph section>More Choices. In the Paragraph window>Indentation section>Special drop-down, select “None.”
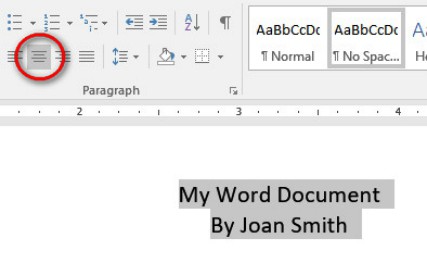
Now that those two lines are single spaced and against the left margin, let’s center them. With the two lines still selected, select Home tab>Paragraph section>Center alignment.
The first line of your story should still be in our double-spaced, indented format, right? Now you are ready to continue your story or save this document for a sample before saving and exiting for the day.
Did this article help you understand how to change font size, alter margins, and more? Let us know any comments you still have below!
UP NEXT: How to Make a Graph in Excel