Word Headers And Footers
 This lesson will introduce headers and footers, so we’ll need several pages of text. Either open a previous document with three or four pages or copy and paste this lesson into a new Word document. In a previous lesson, we learned how to paste text only. Use Ctrl-C to copy the words from the website, then Right-click>Paste Options>Keep Text Only.
Headers and Footers | Learning The Basics In Word Document
The page and word count may be found in the bottom left of your screen. If you need more pages, try double-spacing your text or increasing the font and/or margin size. Also, you can paste text only twice.
Headers and Footers
Do you have a book with the chapter title on the top of each page? That is a “header,” something that is the same at the head or top of every page. Do you have a magazine with the date and page number at the bottom of each page? That is a “footer,” something that goes across the bottom of every page.

You can put an image or special characters in the header or footer. You can put the page number and date that automatically updates. Think of the header and footer as separate little documents within your main document – you can change the font, margins, or tabs without affecting the main body of your document.
Insert Header
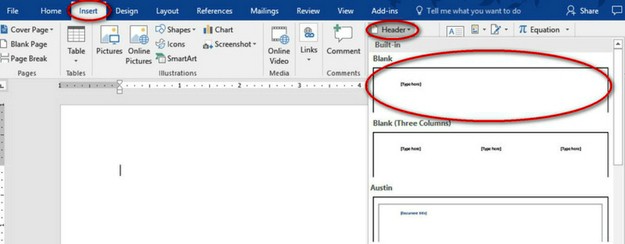
From any position on your four-page document, click Insert tab>Header & Footer section>Header. The Header drop-down menu will appear. For today’s header, click the top option, “Blank.” Word will insert a blank header into your document and the Header & Footer Tools/Design tab appears. Read through the options on this ribbon to give yourself some ideas of what is available.
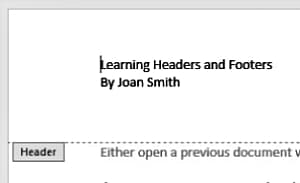
Within your new header, click in the “[Type here]” box and type the title of your document, “Learning Headers and Footers.” Press enter and type your byline: “By Joan Smith.”
When creating a header, Microsoft sets it up with the same left and right margins and single-spaced, and places it 1/2” from the top of the paper. You can change these settings in your Header & Footer Tools/Design tab>Position section.
Press Enter twice after your name. This will make your header taller, and push the body of the document further down the page, on EVERY page.
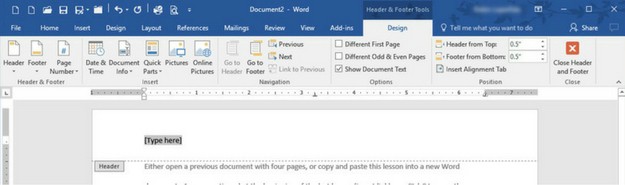
While you are typing in the header, your header’s text is darker than the body of your document. There is a dotted line separating the header from the body, and there is a small grey “Header” label. That’s so you know exactly where you are.

To exit out of your header, click Header & Footer Tools/Design tab>Close section>Close Header and Footer – the big orange “X” on the right of the ribbon. After you close the header, the header label, dotted lines, and Header & Footer Tools tab have all disappeared. Now the body of your document is darker and the header text is lighter.

Let’s go back and make some changes to the header. Double-click the words in the header. Does the Header label and dotted line reappear? Voila! Ctrl-A to Select All and everything in the header is selected. Let’s make it one size smaller by clicking on the Home tab>Font section>small “A” to Decrease Font Size.
To exit the header this time, double-click on any word inside the body of your document. Remember there are usually two or more ways to do something in MS Word.
Insert Footer
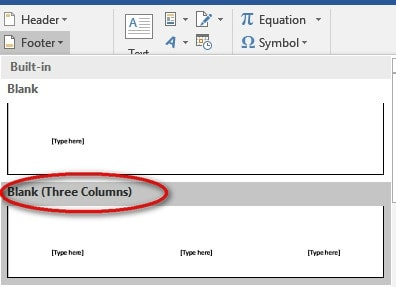
Go back to our Insert tab. Click on Insert tab>Header & Footer section>Footer. For our Header, we selected “Blank.” For our Footer, select “Blank (Three Columns).” This put a blank footer at the bottom of the page, but it is all set up for a left-aligned first column, a centered second column, and a right-aligned third column.
Click on the left “[Type here]” box and type “Word Lessons.”

Click on the middle “[Type here]” box. Do you remember how to insert the date from our earlier lesson? (Insert link) You can use the Insert tab as we did in that lesson, or this time use the Header & Footer Tools/Design tab>Insert section>Date & Time.

Just for fun, select a format you haven’t used before, then click OK.
Now click the right “[Type here]” box. Type the word, “Page” and hit space. From the Header & Footer Tools/Design tab>Header & Footer section>select Page Number. The Page Number drop-down menu will appear. I always like to position my cursor exactly where I want an object before I insert anything, which we did when we typed “Page” and a space, then used the “Current Position” selection from the Page Number drop-down menu. Click Current Position to get the position menu. Now click on “Plain Number.”

If you followed the instructions your footer will look just like this screenshot. 
Do you see the Footer label and dotted lines, just like when we were working in the header? Exiting the footer is just like exiting the header. You can click the big orange “X” in the Header & Footer Tools tab, or simply double-click within your document. Go ahead and exit out of your header to try it, then double-click to go back. Let’s make the footer one font size smaller before going back to our document: Ctrl-A to select the footer, then decrease the font size by one.
Exit out by clicking Header & Footer Tools/Design tab>Close or double-clicking the body of your document.
Different First Page
While the footer or header helps you identify your document, you might want the first page to look a little different, such as in the cover of a report.
Click on the first word of your document. Now double-click your header to bring up the Header & Footer Tools tab. In the Options section, the first checkbox is “Different First Page.” Go ahead and check that. Your header and footer disappeared! Now scroll down to page two and there they are!

There is now a blank footer on the first page waiting for your input. Or just leave it blank by closing the header and footer.
Experiment
Before you leave today’s lesson, experiment with your header or footer. Insert an image, make the font bigger or smaller. Remove your header or footer by selecting it, then press Delete, and double-click to return to your document – no more header!
Ctrl-Z will always undo one step, so have some fun. The more you experiment with new skills, the more proficient you will become.
Up Next: Microsoft Word Lesson 4: File Tab Pushpins, Browse, and Envelopes