How To Edit Signature In Outlook

After learning how to use Outlook for the first time, the next step to master is how to edit signature in Outlook. When you know how, you can create your signature according to your own style. You can use it to promote your business or yourself. To help you get started, here is a short tutorial.
How to Edit Signature in Outlook in Two Easy Ways
In This Article:
- How to Edit Signature in Outlook with New Email
- How to Edit Signature in Outlook through Options Menu
- Tips on How to Maximize Your Outlook Signatures
How to Edit Signature in Outlook with “New Email”
There are two different ways on how to edit signature in Outlook. The first one allows you to design a signature from within a new email.
Here are initial instructions:
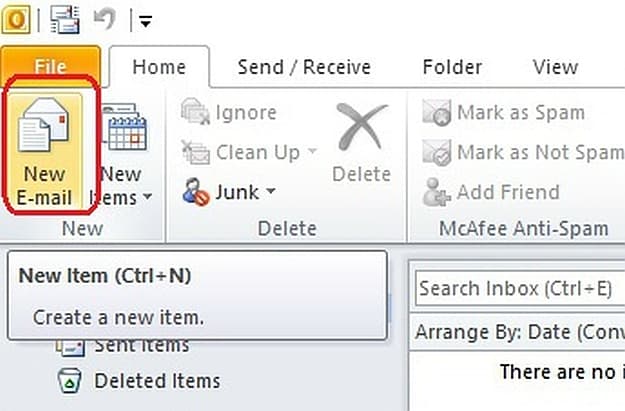
- Look for the “Home” tab on the horizontal bar at the top of your Outlook application screen. Click it to make sure it’s active.
- Select the “New Email” icon located in the “New” panel. You’ll find it on the top left side of your screen.
- Look for the “Include” panel once you’ve pulled up a blank email template. There, you’ll see an icon looking like a piece of paper with a pencil across it labeled “Signature.”

- A drop-down menu with the word “Signatures” will appear when you click it. Go ahead and click that selection.

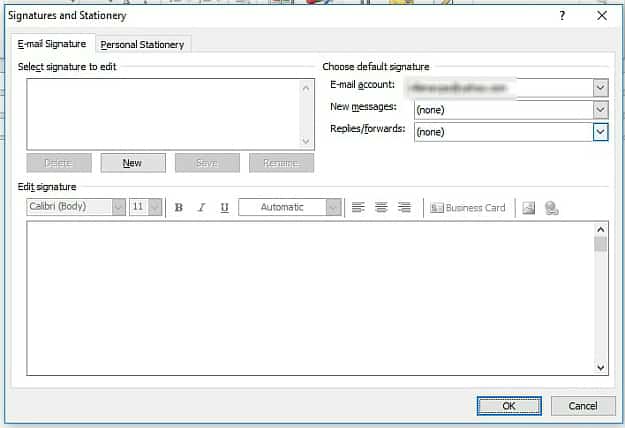
- A new pop-up screen will appear with the title “Signatures and Stationery.” We’re focused on how to edit signature in Outlook for your emails, so make sure the “E-Mail Signature” tab is active by clicking it.
Work on Your Signature
You’ll see two sections of the screen. The first half lets you set up email options, create a new signature template, or choose a pre-set signature if you’ve already created one. If this is your first time in this area, you won’t have anything to select from.
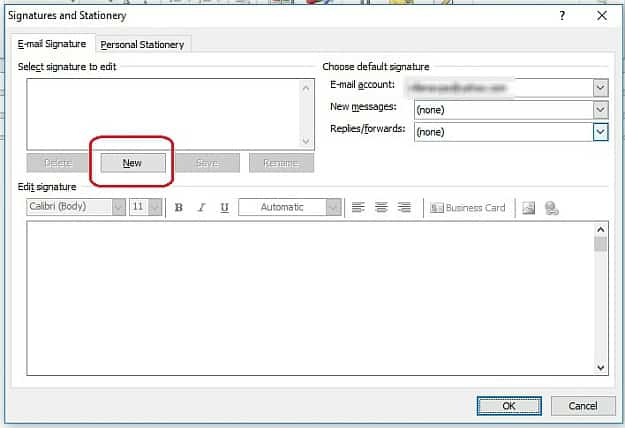
The second half contains the signature editor, allowing you to make modifications to your signatures. To start building a new signature, click the “New” button located beneath the text area in the upper-left side of the screen.
- You’ll get a new pop-up titled “Signature” with the text “Type a new name for this signature.”
- Name your signature file to help you identify it in the future.
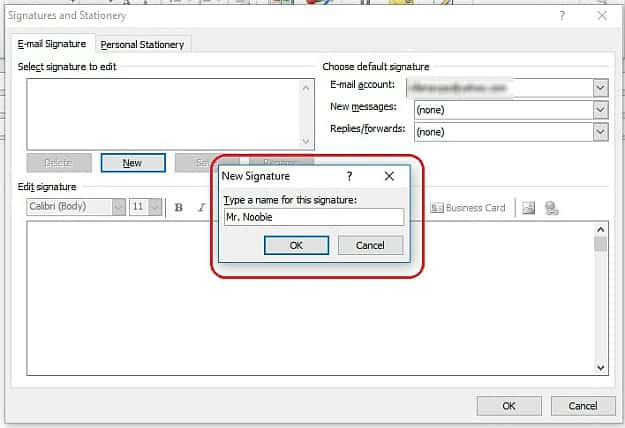
- Click the “OK” button once you’re done. If you’re not ready to proceed, click “Cancel” to get rid of any changes.
- The bottom half of the screen becomes active once you’ve created a signature.

- Take time to check out all the different formatting options available to you. You can edit the texts in bold, italic, or underlined. You can also position them to the left, center, or right. Other options can allow you to insert images saved to disk and business cards saved in Outlook, as well as add links to other websites.
- Select the drop-down menu labeled “New Messages” next. This designates the default signature going out with each new email. You shall now see the signature you created in the list. Go ahead and select it if this is what you want to use for your new outgoing emails.

- Do the same in the “Replies/Forwards” drop-down menu located right below, which places your selected signature in all your responses.
- Click “OK” to save all your changes.
The signature you created appears as an option when you create a new email and click the “Signatures” icon. Selecting one automatically inserts it at the bottom of your email body.
How to Edit Signature in Outlook through the Options Menu
You can also access these same features through Outlook Options:
- To get to this section, click the “File” tab at the top of the Outlook application.

- You’ll see “Options” in the blue panel on the left side of your screen. Click it to pull up a new pop-up menu labeled “Outlook Options.”

- Select the “Mail” tab in the “Outlook Options” screen.

- Click the “Signatures” button.

This pulls up the same screen you access directly through a new email. From there, you can follow the instructions on how to create and edit signature in Outlook.
Tips on How to Maximize Your Outlook Signatures
Don’t just create beautiful signatures. Make them count with these tips:
- Take your time. Try out all the different email options. Note how well different colors and fonts work together. Think about what position will make the most impact without making your email look too cluttered.
- Make sure to include all relevant information. Tell your contacts who you are and how they can reach you if they need more details. (Don’t forget to keep yourself safe online at all times.)
- Create multiple signatures. If you have a lot of different email accounts attached to your Outlook, you can make different signatures for each. You do that by clicking the “Email Account” drop-down option in the upper-right-hand corner of the screen.
Learn how to create and edit signature in Outlook that is professional-looking. Get some tips from Peter Giesemann:
That’s how simple learning how to edit signature in Outlook can be. Try out several different variations until you find the one you’re happy with.
Do you have some tricks on how to edit signature in Outlook? Tell us your secrets below!
Up Next: How To Sync Google Calendar With Outlook For Updated Reminders