Microsoft Word Lesson 6: How to Insert an Image, Resize It, and More
 In previous Microsoft Word Lessons, I taught you everything from saving to file tabs. Now, we’ve reached the final installment to the series, and I’m going to teach you how to add personality to your documents. Today, we’re going to learn how to insert an image.
How to Insert an Image: Adding Personality to Your Projects
Open our practice document for one last time with File tab>Open and click. It’s becoming quite a masterpiece, isn’t it? If you haven’t been following along, you can still learn how to insert an image; just set up a new document with your name and address centered at the top, then follow along.
We want our letterhead to stand out and represent our personality (or business), which is why we are learning how to insert an image. After all, a picture is worth a thousand words, right?
ClipArt or Online Pictures
Microsoft Office used to have images called ClipArt that came bundled with the software. ClipArt was a package of images you could use in your document without breaking copyright laws. Now they’ve moved all the images to the internet and call them Online Images.
I’m going to use a picture of a computer to show you how to insert an image, but feel free to search for a different image: a flower, a puppy, your initial — whatever you like!
Insert Online Pictures
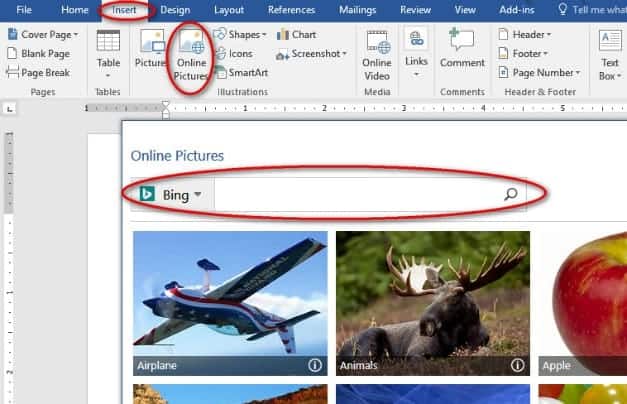
On the Insert tab>Illustrations section>select Online Pictures, and the Online Pictures window will pop up. Microsoft will give you some picture category ideas, such as “Animals” or “Airplanes.” You may click a category, but for today, let’s type a specific word in the “Bing” search box. Type a description of an image and press Enter. I’ll search for “computer,” but you can search for “tree,” “puppy,” “butterfly,” or something else — just be specific whenever you are searching. When you press Enter, Word will use Microsoft’s Bing search engine and look through its Online Images, aka, ClipArt.
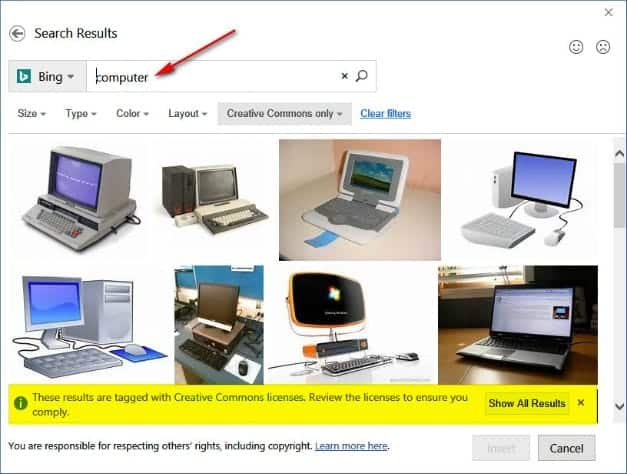
Notice the yellow bar that appears warning you about licensing. Just stick with the original results so you stay within copyright laws. Don’t click Show All Results.
If you don’t see anything you like, try a new, more specific search. For example, instead of “tree,” type “pine tree” in the Bing search bar and press Enter.
Scroll down and select the image you like best by clicking on it, then click Insert.
Image and Word Wrap
You just inserted your image in your document! However, this isn’t quite everything there is to know about how to insert an image. Notice that it is still selected and waiting for your modifications — when it is selected, it has eight small squares called handles surrounding it.
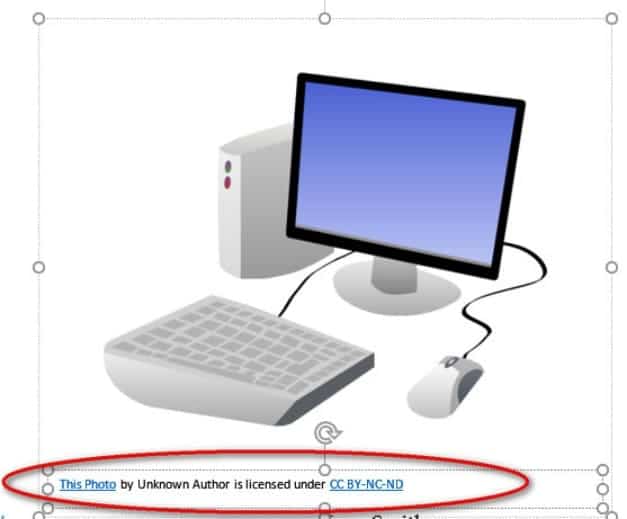
At the bottom of the photo, MS Word put some licensing information. Let’s get rid of that by clicking on the words at the bottom of the image until eight more handles surround the words, then click delete. The licensing information may also disappear when we resize our image, but deleting it is easy.
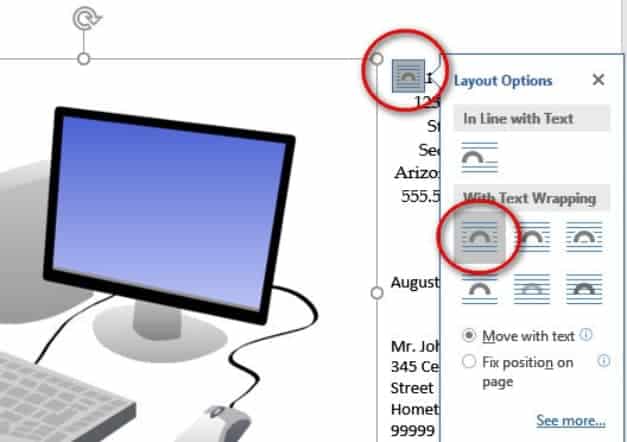
Near the top right of the image will be a small formatting box, called Layout Options if you hover over it. Click on the box. You will see lots of text/image options in two sections, “In Line with Text” and “With Text Wrapping.” Select With Text Wrapping>Square from this menu to wrap your text around the image in a square. This will keep our text from overlapping the image, or the image from printing on top of our text; the text can “wrap” or go around the image on the left, right, top, and bottom.
Resize an Image
Usually the images are way too big for our document. This keeps the image sharp as we resize it. However, let’s make this image smaller. Is it still selected with the handles showing? If not, click on the image so you see those handles.
Here is an important tip: When you are resizing, always hold down the Shift key and grab a corner handle. Holding down the Shift key and dragging a corner will always keep the image in perspective. Have you ever noticed a stretched computer image, either too tall and skinny or too short and fat? That’s what can happen if you don’t hold down the Shift key or use a side or top or bottom handle. Some programs, like MS Office and Word, will resize proportionally if you select a corner handle without Shift, but some don’t. Just get in the habit now: Shift and drag a corner to resize. You can play with the other handles if you want to see what happens. Just undo with Ctrl-Z each time to get your image back to its original shape.

Now hold down Shift and drag one of the corner handles to make the image smaller, about the same size as your name and address.
Move an Image

To resize an image we grab a handle, right? Not this time. Instead, to move an image, put your cursor on the image but NOT on a handle. Put your cursor right in the middle of the image, and your cursor turns into a crosshair called the Move cursor. Once you have the Move cursor, click and drag the image around your document. Move the image through your name, and you’ll see your name wrap around the image.
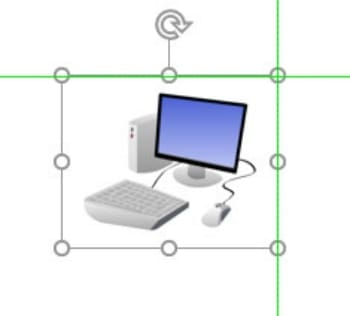
Move the image up to the top left or right of your document. Did you see the green guidelines that appeared? These will show up when you are near the margins or the center of the page to help you line up your graphics. Line up the image with the top green guideline and the left green guideline. Click to lock the image in place. If you prefer, try the right green guideline instead. It’s all up to you.
Change Text Wrap
Look closely, and you will see that when we moved the image next to our name, our address block moved to the center of the open space. It is no longer in the exact center of the page, because the image is taking up space between the margins. To center our name and address properly, we want the centering to ignore the image.
Often Word has more than one way to perform a command, and this is true with understanding how to insert an image and format it. Earlier we used the Layout Options box to format our text around the image. This time we will use the Microsoft ribbon.
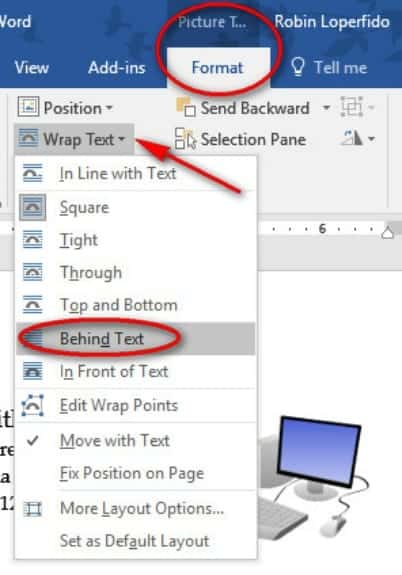
When you select the image, a new menu tab appears labeled Picture Tools/Format – do you see it? If not, select your image to make it appear. These magically appearing and disappearing tabs show up all through Microsoft Office when you select certain objects, like images.
On this Picture Tools/Format tab>Arrange section>click the drop-down arrow with Wrap Text. This menu is similar to the Layout Options we used earlier. Remember, there are often two or more correct ways of giving the computer a command. Select Behind Text. Now look at your address, and it should be back in the center of the page. With Behind Text or In Front of Text, the text spacing ignores the picture, and the picture ignores the text.
Save As a New Document
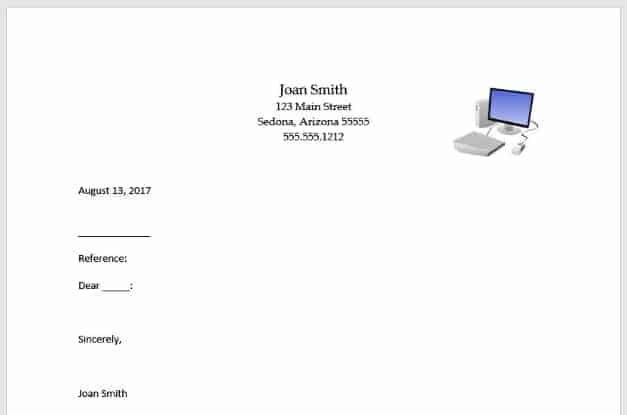
If you’ve been following along with creating our letter, we have now completed formatting a letter with a personal letterhead, a date that updates automatically, a reference line, a salutation, and a signature block. Save this practice document by clicking the diskette icon in the top left, and now we’ll go on to creating a template.
After you save your work, go to File tab>Save As… so we can save this same document with a new name. Give it a name with the date first, then “Letter Template,” for example, “2017.07.01 Letter Template.” Save it to your My Documents folder.
You have two copies of your letter now, right? The original is safe, and we are working in our template. For the template, we are now going to delete a lot of our practice information.
We’re keeping the letterhead and date. (If you want to delete the image, simply click it, then press Delete.)
Select Mr. Brown’s name and address and hit Delete. When you are using the template, you will type the recipient’s name and address here. Some people like to replace the name with a few underscores so you know where to type.
Go to your Reference line, and drag through the Account Number to the word “Club.” Don’t select “Reference:” Now press delete. Our reference line with tab stops is still there waiting for you to type pertinent information.
After “Dear” double-click “John” to select, and press Delete. This is where you will add the real recipient’s name.
Delete everything between our salutation and signature block. It should look just like this but with your information.
Click the diskette icon to save your template — we already gave it a new name, remember? The next time your need to write a letter, simply open this template, go to File tab>Save As and give it a new date and name, then use the format to write your letter. By doing File>Save As with a new date and name, you will keep the blank template as a form to fill out, and it will be easier to find your new letter.
You may even want to save a backup version in case you forget to do a new “Save As” as a you type a new letter.
If you are going to send the letter via email, be sure to save it as a PDF to freeze the information and the date of the letter. We covered that in an earlier lesson, here.
Do you now understand how to insert an image? Let us know if you have any more questions in the comments below!
UP NEXT: Microsoft Word Lesson 4: File Tab Pushpins, Browse, and Envelopes